Share This Page With a Quilting Friend
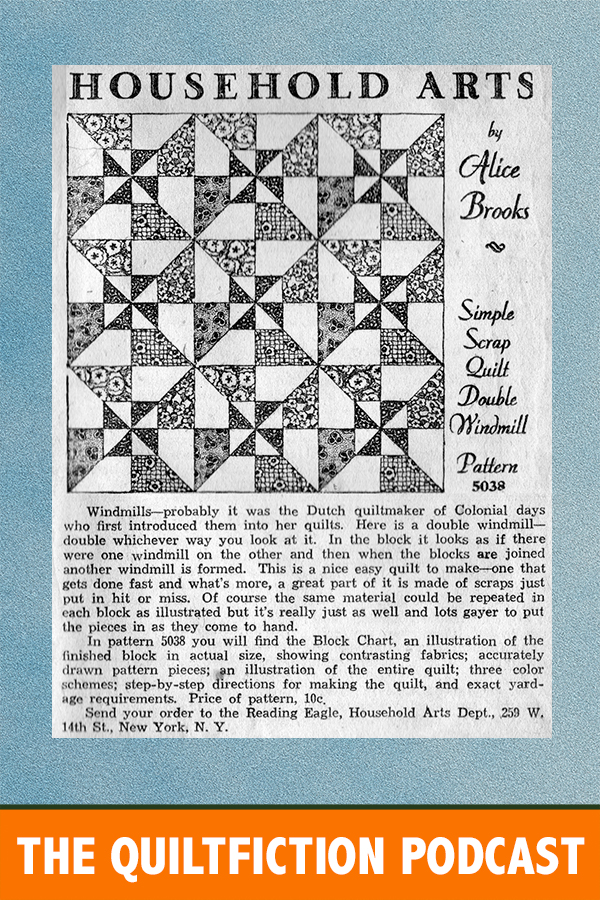
Have I told you about the scrapbook I found on eBay a few years ago? It’s a collection of 1930s quilting columns by Nancy Page, Florence LaGanke, Alice Brooks and others. The columns are pasted in a book called SCHOOL LAWS OF PENNSYLVANIA 1913. When I started writing Friendship Album, 1933, I knew I wanted to make a series of 1930s-style quilts to go along with the story, so of course the first place I looked was in the pages of my scrapbook. I knew I’d found my quilt when I found this:
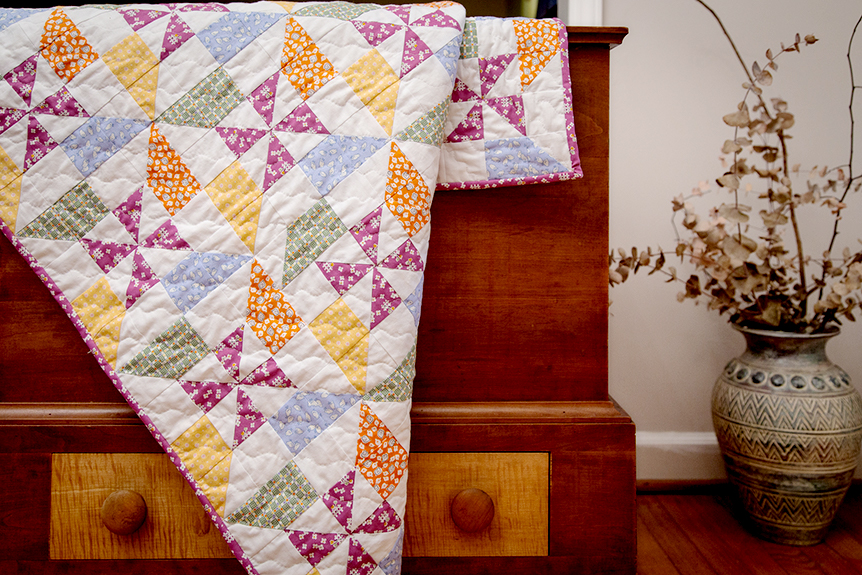
With the help of co-conspirator Patty Dudek of Elm Street Quilts, I put together my own Double Windmill quilt and now I want to share our pattern with you!
Double Windmill Scrap Quilt: A Milton Falls Quilting Co. Pattern
by Frances O’Roark Dowell and Patty Dudek
Materials
- Outer pinwheel (yellow, orange, green, and blue) – ½ yard of each color
- Center pinwheel (purple) – ¾ yard
- Neutral (white) – 2 yards
- Binding (purple) – ½ yard (assumes 2 ½ ‘’ cut on straight of grain)
- Backing – 3 ¾ yards
- Batting – 52 x 60’’ (throw or twin sized)
Block size: 8 ½’’ square
Quilt size: 48 x 56 ‘’
Preparation and cutting
Assumes pieces are cut from yardage with a 40’’ usable width of fabric (WOF). (Not all fabric cut into squares will be needed for the quilt. Put the excess aside in case a block needs to be remade or perhaps to add interest to backing.)
From the center pinwheel fabric (purple), cut the following:
- Cut seven (7) strips, 3’’ x WOF and sub-cut each strip to thirteen (13) 3’’ squares for a total of eight-four (84) 3’’ squares.
From each of the four colors (yellow, orange, green, and blue) for the outer windmill, cut the following:
- Cut two (2) strips, 3’’ x WOF and sub-cut each strip into thirteen (13) 3’’ square for a total of twenty-one (21) 3’’ squares
- Cut three (3) strips, 2 ½ x WOF and sub-cut each strip into sixteen (16) 2 ½ ‘’ squares for a total of (42) 2 ½’’ squares
From the neutral (white) fabric, cut the following:
- Cut thirteen (13) strips, 3’’ x WOF and sub-cut into thirteen (13) 3’’ square for a total of one hundred sixty-eight (168) 3’’ squares
- Cut eleven strips, 2 ½ x WOF and sub-cut each into sixteen (16) 2 ½ ‘’ squares for a total of one hundred sixty-eight (168) 2 ½ ‘’ squares
From the binding fabric (purple), cut six (6) strips of 2 ½ ‘’ x WOF.
Piecing
The Half-square triangle (HST) blocks are created two at a time following this tutorial.
1. Pair a 3″ neutral (white) square with a center pinwheel (purple) square. Using the two-at-a-time method (tutorial), create two (2) HST blocks. Trim each HST to 2 ½‘’ square. Repeat to make a total of one hundred sixty-eight (168) neutral (white) / center pinwheel (purple) units
2. Pair a 3” neutral (white) square with each of the 3” squares from each of the four colors from the outer windmill (yellow, orange, green, and blue). Using the two-at-a-time method, create two (2) HST blocks from each pair. Trim each HST to 2 ½ ‘’ square. Make a total of forty-two (42) HST from each of the outer windmill (yellow, orange, green, and blue) fabric.
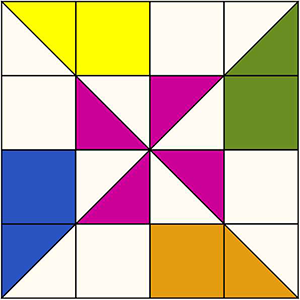
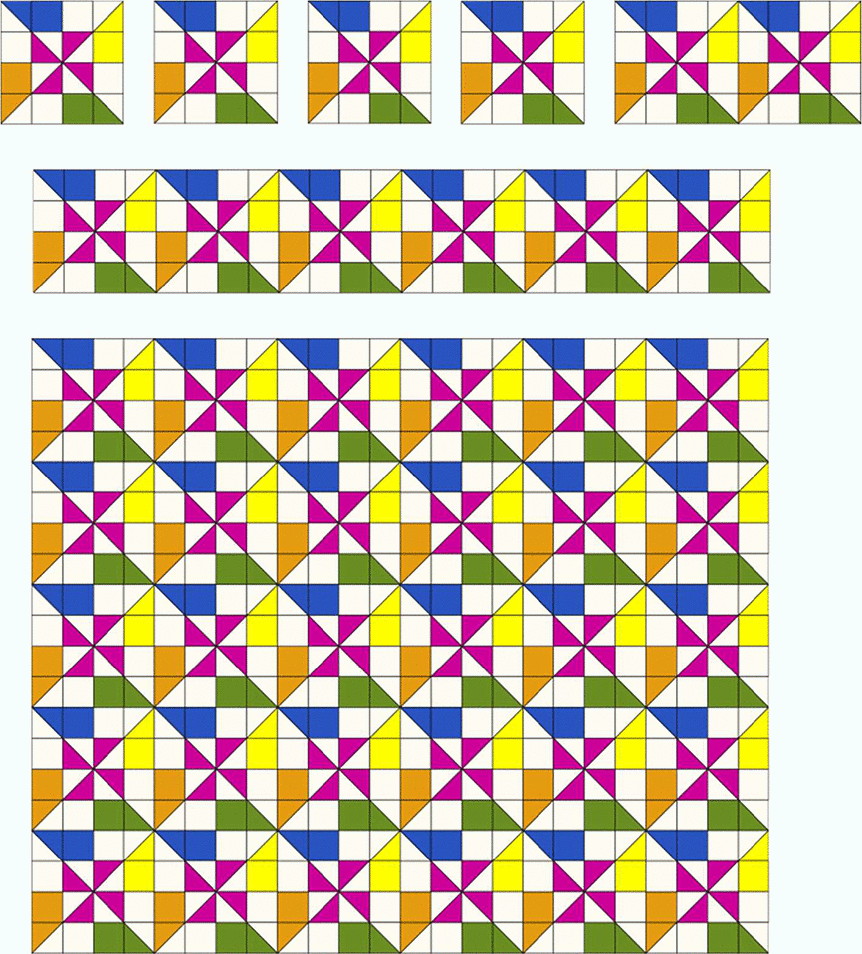
3. Each block unit will use (1) 2 ½ ‘’ square and (1) HST from each of the outer pinwheel fabrics (yellow, orange, green and blue) plus (4) HST from inner pinwheel (purple) plus (4) neutral (white) 2 ½ ‘’ squares. Following diagram, assemble block unit. Block will measure 8 ½ ‘’ square (unfinished).
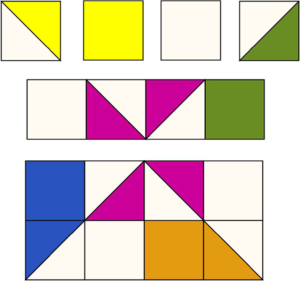
4. Assemble a total of (42) blocks. Press.
Quilt top assembly
1. Lay quilt blocks on design wall (or floor) following quilt layout. You can orient your blocks anyway you want, just make sure they are consistent. There will be seven (7) rows each comprised of six (6) blocks. Sew blocks together into rows and then sew together rows.
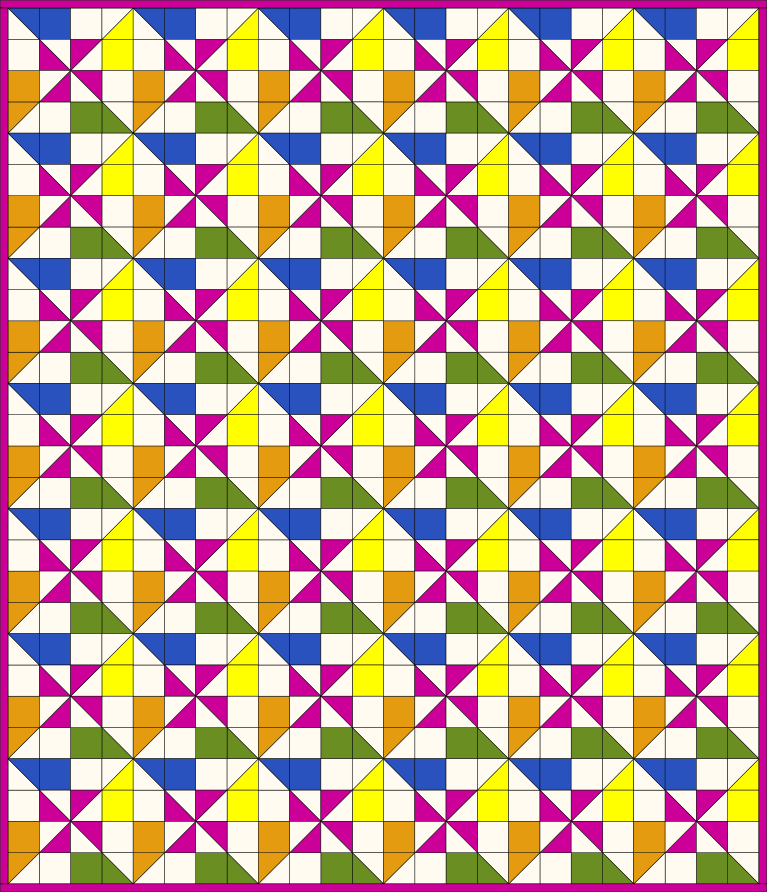
2. Final quilt top will measure 48 ½ ‘’ x 56 ½ ‘’ unfinished.
Piece together backing fabric to form a piece 56 x 64 ‘’. Baste. Quilt as desired. Join binding strips and press in half. Attach to quilt using your favorite method.
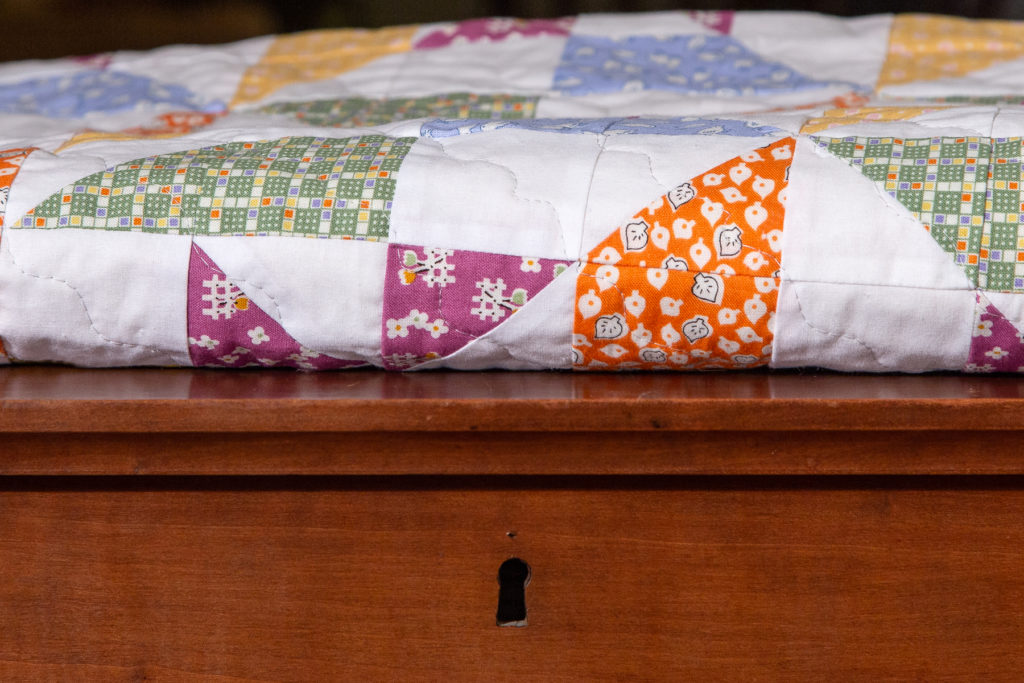
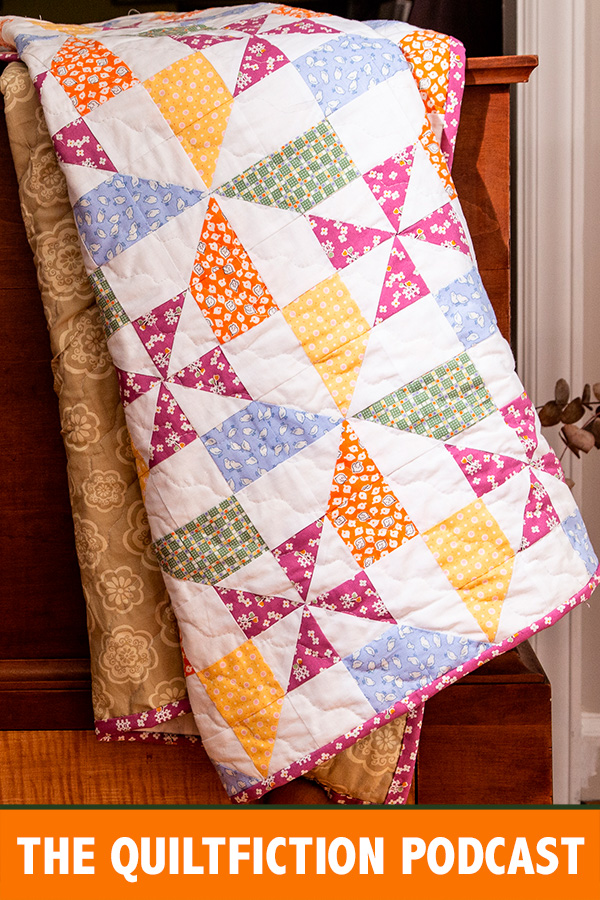
Finished Quilt:
![]()